


Today we are going to build a popular solution that uses S3 to host your SQL backup file and import this into your new RDS database.
Goal
By the end of this tutorial, you will have created and connected to an RDS SQL database, uploaded and restored the backup file to the RDS SQL database.
💰Warning: RDS with SQL Server can become veeeery pricy. Clean up after use and the RDS database might not be deleted with CDK destroy. Double-check in the console.
You can find the AWS article and more in-depth details on this solution here: Import SQL DB
Time: Roughly 2 hours including waiting for deployments
Difficulty: Medium +
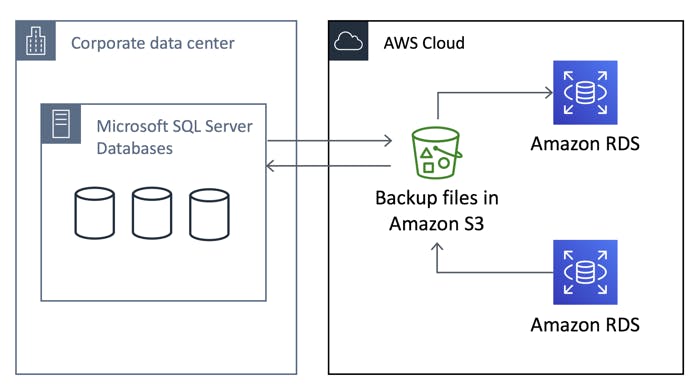
The Architecture
Preparation
You will need:
- New CDK project or clone the finished code from here: Code
- Microsoft SQL Server Management Studio or your alternative to connect to the SQL database.
- a backup .bak file, here is an example that I will use: Download from Github
Finished Code: Code on Github
Create a new CDK Project
The first step is to initialize a new Typescript CDK project. If you are unsure please check this tutorial: Your first AWS CDK app
$ cdk init app --language typescript
Install CDK Modules
Let's install all the CDK Modules that we are going to need today. Open package.json and add this part under dependencies. Check your current AWS-CDK version ('cdk --version') and replace the version numbers with yours.
In my case, I'm at 1.63.0:
  "dependencies": {
    "@aws-cdk/aws-ec2": "1.63.0",
    "@aws-cdk/aws-iam": "1.63.0",
    "@aws-cdk/aws-rds": "1.63.0",
    "@aws-cdk/aws-s3": "1.63.0",
    "@aws-cdk/core": "1.63.0",
    "source-map-support": "^0.5.16"
  }
Now run 'npm install' in your terminal.
If you get lots of peer dependency errors: Run in your terminal: 'npx rocketcdk up'. This will update all your CDK packages to the latest version and remove the errors.
Create the RDS Instance
File: lib/stack.ts
First, let's create the RDS instance that is going to host our SQL Server database. Import these modules on top of the file:
import * as cdk from '@aws-cdk/core';
import * as rds from '@aws-cdk/aws-rds';
import * as s3 from '@aws-cdk/aws-s3';
import * as ec2 from '@aws-cdk/aws-ec2';
import * as iam from '@aws-cdk/aws-iam'
Additional Services
For this solution we need some additional components that we are now going to create first:
- a VPC (alternatively import an existing one)
- an S3 bucket (To upload the backup file)
- a role + policies that allows RDS to read from our S3 bucket
- an RDS option group; details here
export class RdsMsSqlS3BackupAndRestoreStack extends cdk.Stack {
  constructor(scope: cdk.Construct, id: string, props?: cdk.StackProps) {
    super(scope, id, props);
    const vpc = new ec2.Vpc(this, 'Vpc', {
          natGateways: 0,
    });
    const s3Bucket = new s3.Bucket(this, 's3Bucket',{
      encryption: s3.BucketEncryption.S3_MANAGED
    });
    const role = new iam.Role(this, 'role',{
      assumedBy: new iam.ServicePrincipal('rds.amazonaws.com')
    });
    role.addToPolicy(new iam.PolicyStatement({
      effect: iam.Effect.ALLOW,
      actions: ['s3:GetObject', 's3:PutObject', 's3:ListMultipartUploadsParts', 's3:AbortMultipartUpload'],
      resources: [s3Bucket.bucketArn+ '/*']
    }))
    role.addToPolicy(new iam.PolicyStatement({
      effect: iam.Effect.ALLOW,
      actions: ['s3:ListBucket', 's3:GetBucketLocation', 'sts:AssumeRole'],
      resources: [s3Bucket.bucketArn]
    }))
    const optionGroup = new rds.OptionGroup(this, 'optionGroup', {
      engine: rds.DatabaseInstanceEngine.sqlServerSe({
        version: rds.SqlServerEngineVersion.VER_14
        }),
      configurations: [{
        name: 'SQLSERVER_BACKUP_RESTORE',
        settings: { 'IAM_ROLE_ARN': role.roleArn }
      }]
    });
Create the DB
Create the database with your SQL Server version that you prefer and for the simplicity, we are going to choose the pay as you go "Standard Edition" version.
I set up a simple demo configuration, so go ahead and change it.
Please make sure that your databaseName: ' ' is empty. (SQL quirk)
    const instance = new rds.DatabaseInstance(this, 'mssql', {
      engine: rds.DatabaseInstanceEngine.sqlServerSe({
        version: rds.SqlServerEngineVersion.VER_14
      }),
      instanceType: ec2.InstanceType.of(ec2.InstanceClass.BURSTABLE3, ec2.InstanceSize.XLARGE) ,
      vpc: vpc,
      masterUsername: 'cdkuser',
      databaseName: '',
      optionGroup: optionGroup,
      licenseModel: rds.LicenseModel.LICENSE_INCLUDED,
      storageEncrypted: true,
      allocatedStorage: 50,
    });
And that's all of the code that we need.
Deploy
Now you can build and deploy the code:
npm run build
and afterwards
cdk deploy
The deployment will take easy 20 minutes so don't be surprised if it takes some time.
Upload the Backup File
If you haven't, please download one of the sample files or take your own SQL .bak file. I downloaded this one: Download from Github
Upload this sample file to your new S3 bucket.
Connect to RDS
Log into the AWS console. First, we need to enable some connectivity options.
In the RDS console select modify on the top right.
- set public access to "yes"

- add a new master password

- confirm and select apply immediately.
RDS will apply the changes and will be unavailable to modify for some minutes.
Change Security Group
Open the security group and add your own IP address with these settings.
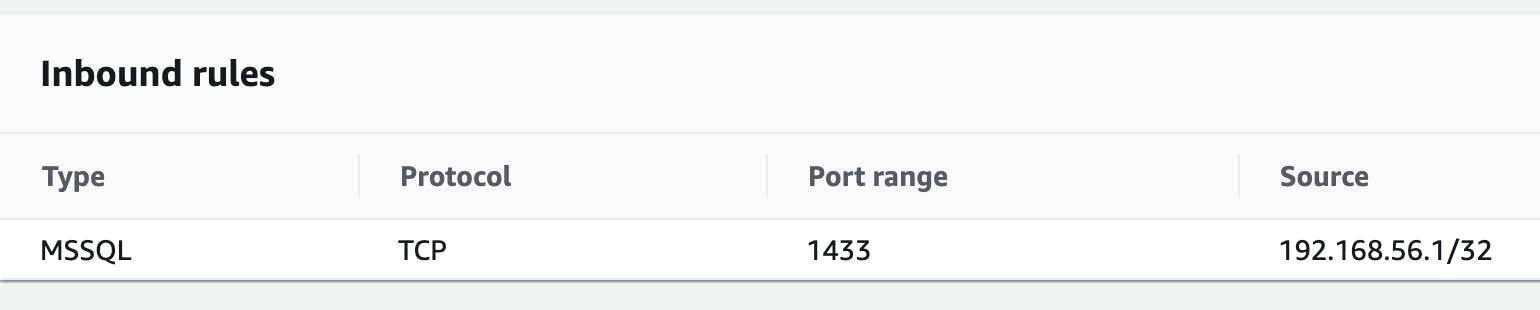
If you are behind a corporate firewall or are working from a corporate network, there is a chance that your IP address is different and connection doesn't work. Ask your networking colleagues for help.
Connect to the Database
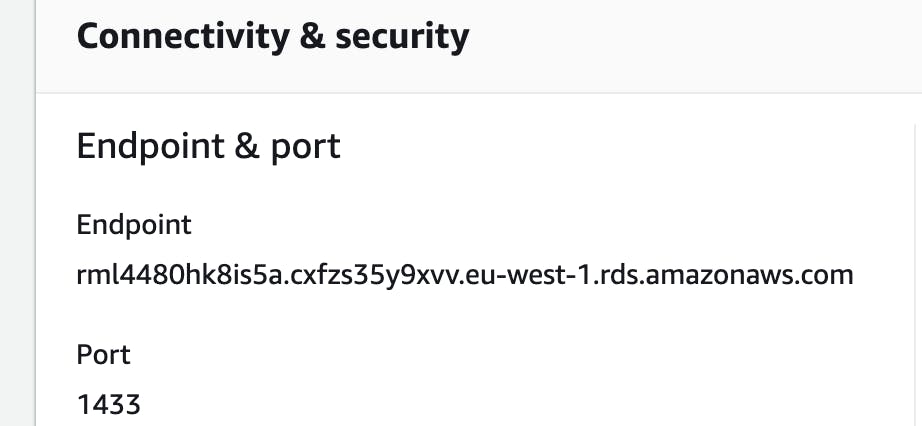
In AWS, copy the endpoint address under "Connectivity & Security" in the RDS overview:
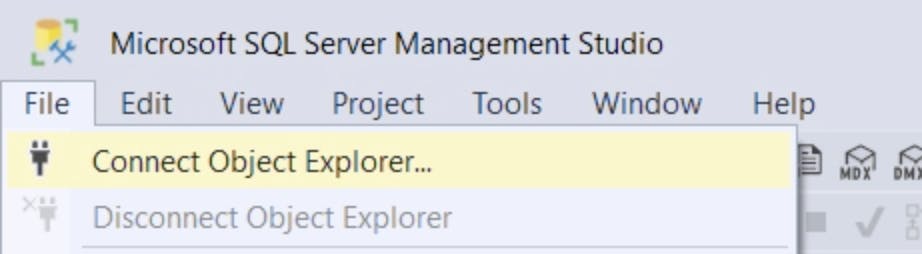
Now open SQL Server Management Studio. Top right "File"-> "Connect Object Explorer"
 Enter these details:
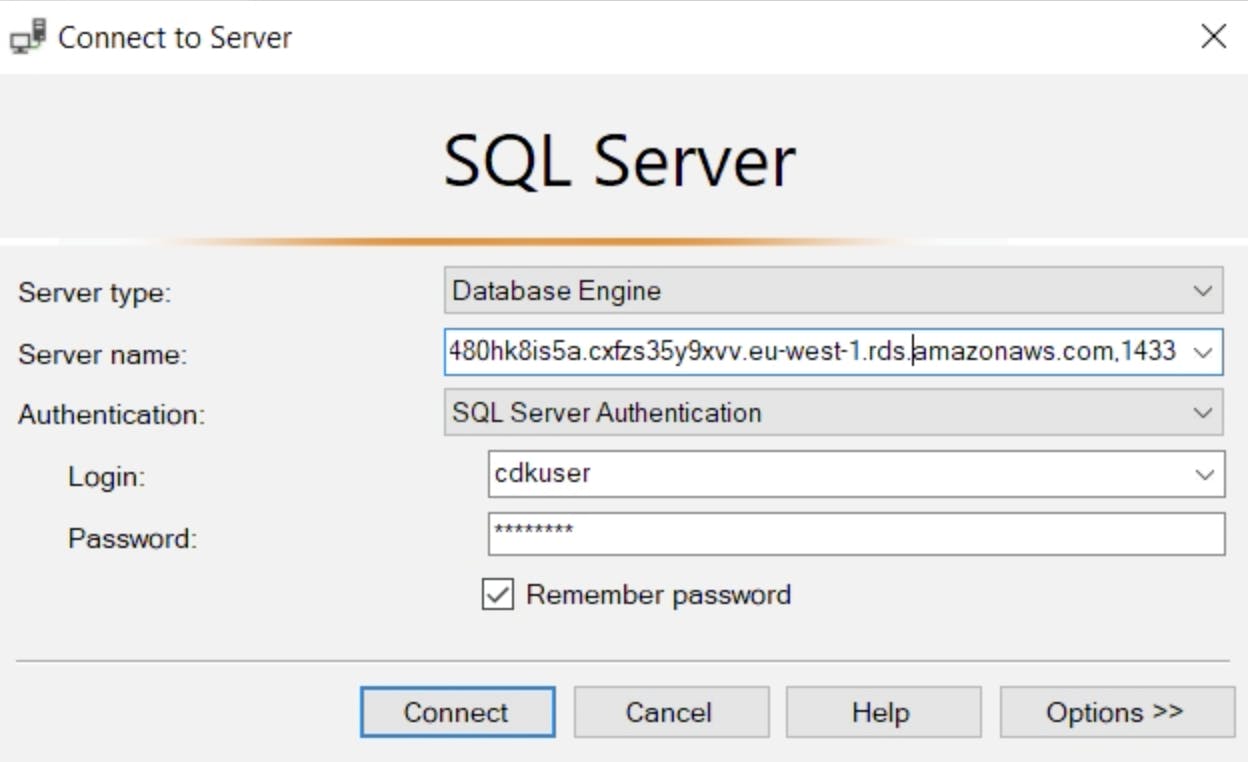
- Server type: Database Engine
- Server name:
Important: The Server name is the Endpoint address plus the port(1433) from above + ,1433
Example Servername string:
kfsdo80hk8is5a.cxfzs35y9xvv.eu-west-1.rds.amazonaws.com,1433
- Authentication: SQL Server Authentication
- Login: The Master username from your CDK template: "cdkuser"
- Password: The one you set in the last steps
Click connect and there is a great chance that it will give you a connection error. 😅
Connectivity Troubleshooting
So let's fix this step-by-step, here is the connectivity issue playbook for solving mysterious connection problems.
Try to connect with SQL Studio between every step:
- Check if Public Access is enabled on the RDS instance
- Set Security Group inbound to 0.0.0.0/0 (Reverse this the moment you know what's wrong back to your IP)
- Check if your VPC has an Internet Gateway attached
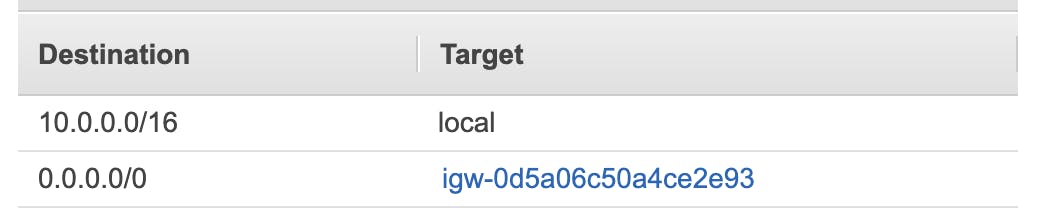
- Check if your Subnet has a route to your Internet Gateway with Destination 0.0.0.0/0 and Target igw-.....
These are the most common problems from the AWS side. It still might be that you are limited from your corporate network.
Restore the Backup
Finally, we are at the point where we can restore the database.
For really detailed steps and options scroll down to Restoring a Database. The options available are too many to cover here: Restoring a Database
We are covering a Full Restore without encryption. This means that the .bak file itself is not encrypted, the database we created is encrypted and so is the S3 bucket. 🔐
New Query
This is the query we are going to run in SQL Studio:
exec msdb.dbo.rds_restore_database
    @restore_db_name='database_name',
    @s3_arn_to_restore_from='arn:aws:s3:::bucket_name/file_name.extension',
- Change 'database_name' to the name you like
- Set 'arn:aws:s3:::bucket_name/file_name.extension' to your S3 bucket ARN + filename.bak
- Don't forget the ; at the end of the SQL statement
Example:
exec msdb.dbo.rds_restore_database
    @restore_db_name='nativebackupandrestore',
    @s3_arn_to_restore_from='arn:aws:s3:::rdevr334ff34restack-s3buc3444re0a6-x10g198ehvyh/AdventureWorksLT2014.bak';

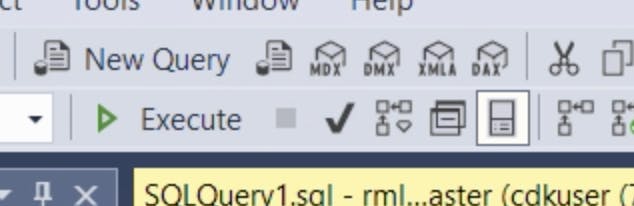
Copy the query and click Execute above with the green symbol.
And this tab pops up:

Check the progress
This is a confirmation that the process started but not a progress indicator.
To find out the progress click New Query, paste below and click Execute:
exec msdb.dbo.rds_task_status @task_id=1;
Once finished it will show:

Finished
Now your Backup and Restore was successful and you can start querying and using your Database. Once you have completed all your Restores you can delete the Option Group and the S3 bucket.
Remember to clean up!🤑
Hope you were successful and you found this tutorial helpful!🚀